Updating to Keystone 2.5
Jump to navigation
Jump to search
Installing Keystone 2.5 Update on Windows 7
When upgrading to Keystone 2.5 from a prior version on a Windows 7 PC, this procedure must be followed to install the update correctly.
NOTE: Do NOT login to Windows as Administrator when updating Keystone. Login as the Windows user who normally runs Keystone.
- Load the 2.5 update normally, using either Web Update or Load Update from the Keystone System Maintenance menu. When asked to release the update, click YES.
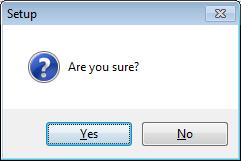
- You will see the following dialog asking if you wish to restart Keystone:
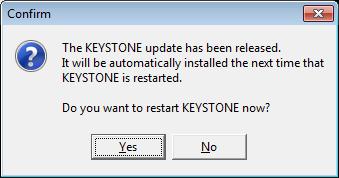
Click YES. - The Keystone splash screen will appear, followed by a message that says "Preparing to install update...". You will then see an error message similar to the following:
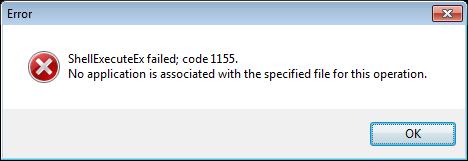
Click OK. - Click the windows START button, select All Programs, select Accessories, then RIGHT-CLICK on the Command Prompt option and select "Run As Administrator."
- You will see the following message:
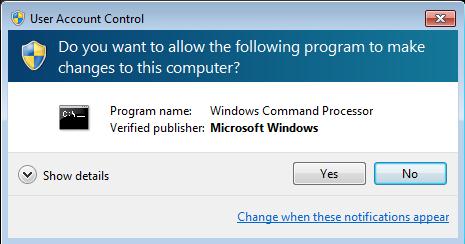
Click YES. - At the command prompt, type:
CD %TEMP%\CCGH
- At the command prompt, type:
DIR CCW*.tmp /od
- You will see a directory listing similar to the following:
Volume in drive C has no label.
Volume Serial Number is BCBF-B23C
Directory of C:\Users\vmuser\AppData\Local\Temp\CCGH
11/11/2011 04:59 PM <DIR> .
11/11/2011 04:59 PM <DIR> ..
10/31/2011 07:02 PM 14,823,954 CCWE87A.tmp
11/11/2011 04:59 PM 14,915,472 CCWA33E.tmp
2 File(s) 29,739,426 bytes
2 Dir(s) 59,800,133,632 bytes free - At the command prompt, type the name of the LAST file indicated in the directory listing, for example:
CCWA33E.tmp
NOTE: If you do not see any filenames listed, please stop and call support! - You will see the following dialog:

Click NEXT. - You will see the License Agreement dialog:
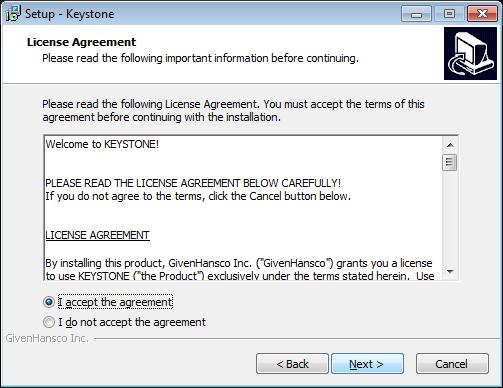
Select "I accept the agreement", click NEXT. - You will see the Select Destination Location dialog:

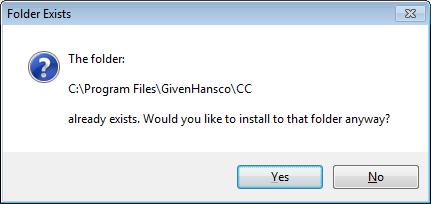
Verify that the highlighted box contains the path to your current version of Keystone (normally C:\Program Files\GivenHansco\CC), click NEXT. - You will see a warning message indicating that the folder already exists:
Click YES. - You will see the Select Additional Tasks dialog:
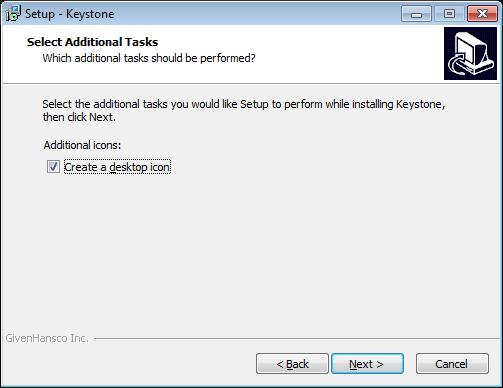
Click NEXT. - You will see the Ready to Install dialog:
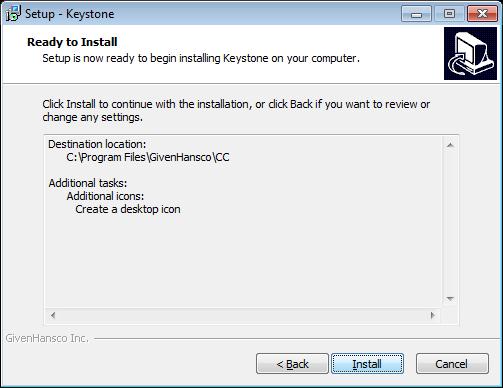
Click INSTALL. - (Network Server/Standalone Only) If the Keystone database files are currently stored in the C:\Program Files\GivenHansco\CC\Cust\Data folder, you will see the following warning:
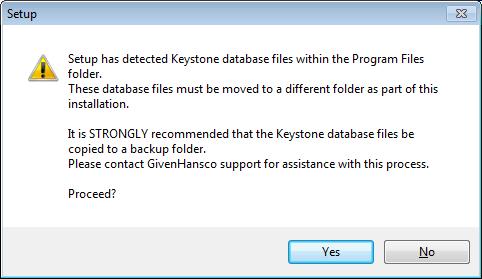
Click YES. - (Network Server/Standalone Only) If the Keystone database files are currently stored in the C:\Program Files\GivenHansco\CC\Cust\Data folder, you will see a second warning:
Click YES. - You will see the Service Applications dialog:
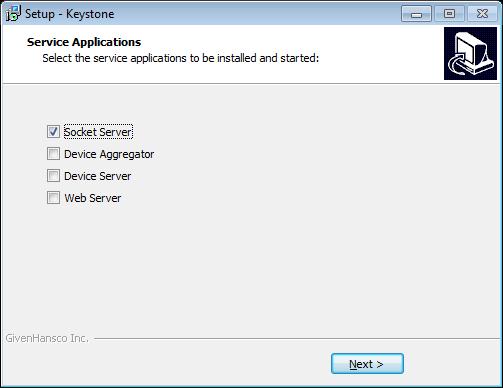
(Network Server/Standalone Only) Ensure that Socket Server is checked.
If other boxes are checked, leave them checked. Click NEXT. - After the update has been installed, you will see the completion dialog:
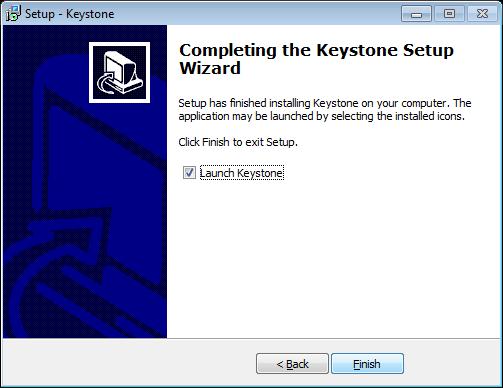
Ensure that "Launch Keystone" is checked, click FINISH. - Keystone will start, update the System and Document Imaging databases (Network Server/Standalone Only) and the login screen will appear.


See Keystone 2.5 Changes for important information regarding Keystone 2.5 Folder locations.